
Business Personal Property Start Return
E-Filing your Return
1. Log in to ORCATS website
A. Enter the following site address into your web browser: https://personal.efiling.orcats.com/
B. Click the “Log In” button from the landing page.
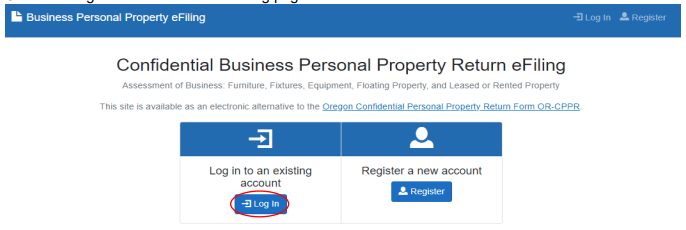
C. Enter the Email and Password used to Register new account and mark the “I’m not a robot” check box.

2. Choosing the account you are ready to process
A. Click the blue “Account List” button to access your asset lists.
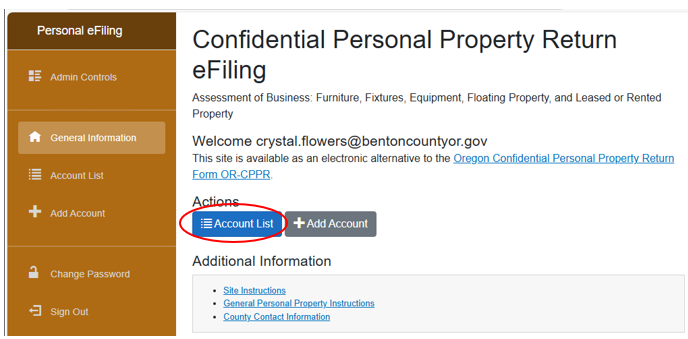
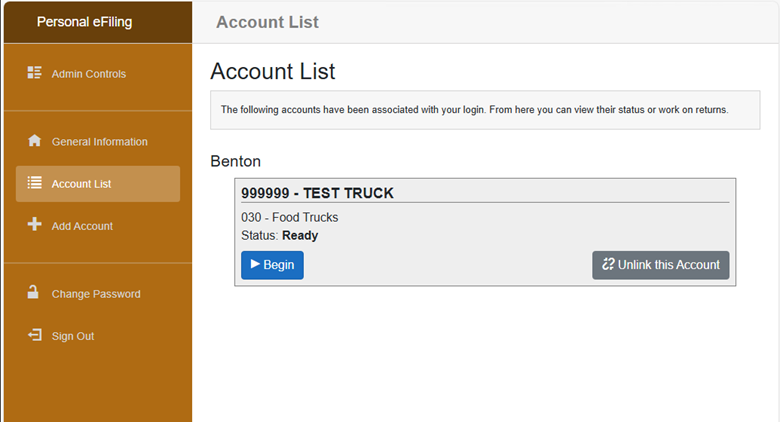
B. All of your linked business accounts will display in this list. Click the blue “Begin” button for the account you would like to start processing. (You will be able to save and go back if you do not have time to complete the return in one session.)
3. Processing your Return
A. Once you click the “Begin” button you will be taken to your account overview page where you can verify the mailing address, navigate to different locations, and asset lists.
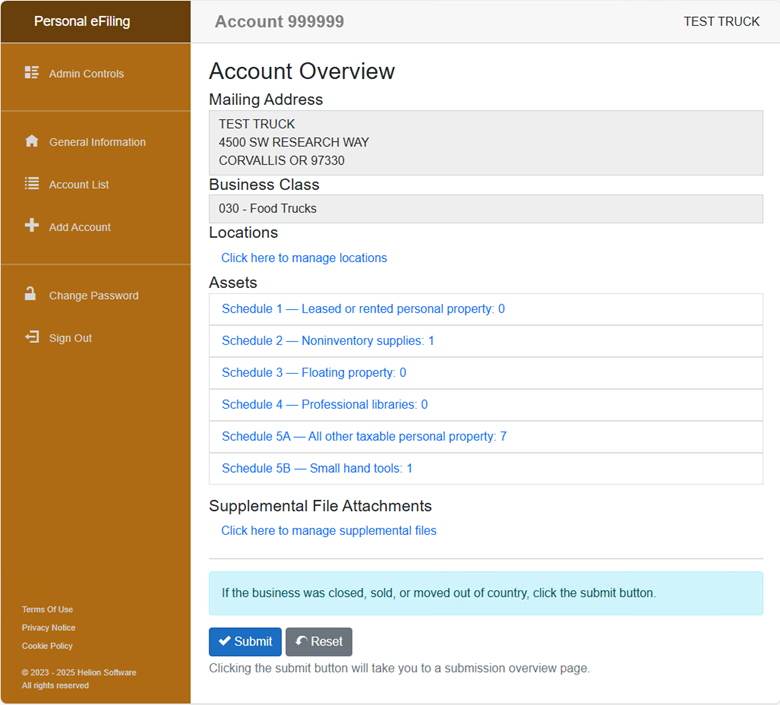
a. Locations: “Click here to manage locations” – Enter the complete address of where Assets are located and click the “Overview” tab to return to the asset list.
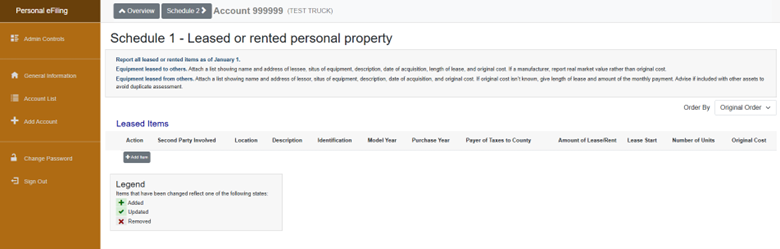
4. Schedule 1 -Leased Assets and Schedule 2 Noninventory Supplies
Be careful when filling out these two sections.
A. Schedule 1 -Leased Assets landing page is where you can verify the assets that are currently on file or to add a new leased or rented asset. Click the gray “Add Item” button to add a new leased asset or click the pencil icon to update an existing leased asset.
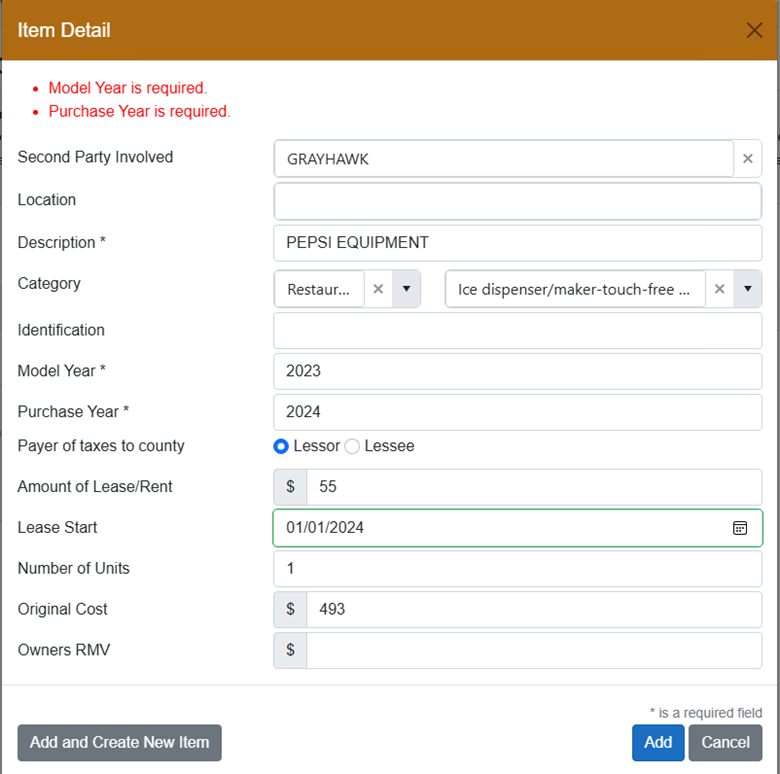
You will then enter the details of the leased asset: Second Party Involved is the leasing company. Once you have entered all of the information click the blue “Add” button.
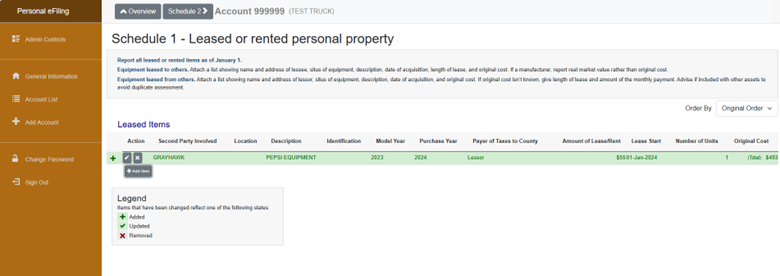
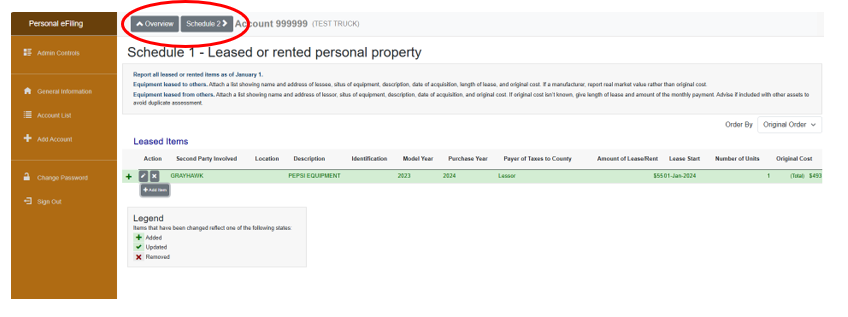
Your items that you add or update will be highlighted in green.
Once you have reviewed Schedule 1 Click the gray “Schedule 2” button at the top, this is how you can navigate between the different schedules of assets.
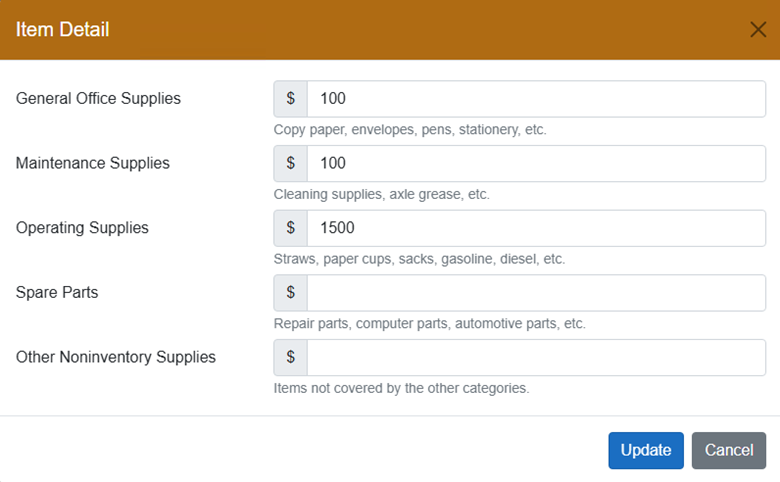
B. Schedule 2 noninventory supplies
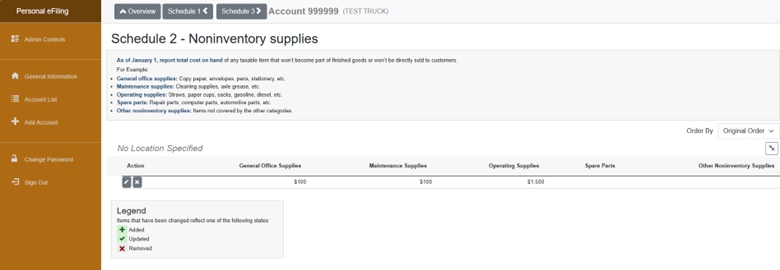
Non-Inventory supplies is not the lump sum of all of your assets these are other supplies used to run your business (ie: paper, pens, supplies that are replaced when used) Fill in each category as it applies. This is an estimated value of what you had on hand January 1st at 1 a.m.
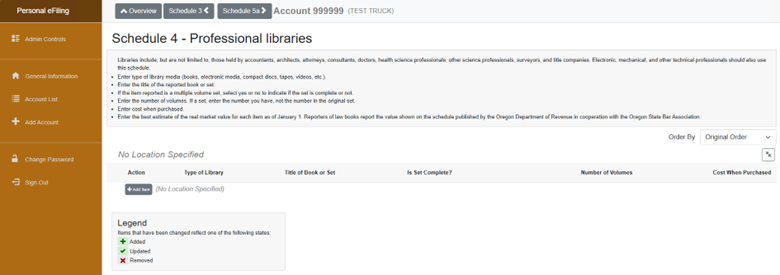
5. Schedule 4 – Professional Libraries
Add similar to schedule 1
6. Schedule 5A – All other taxable Personal Property
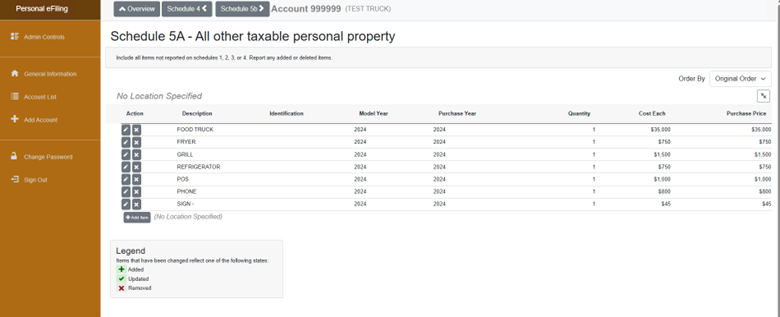
Go through the list that is provided and if you need to delete an item click the gray “x” under Action, if you need to reduce the quantity of an item click the “pencil” under Action.
You will not be able to increase the quantity of an asset you will add a new asset line.
Adding new Assets
Select the “Add Item” button at the bottom of the list. The item detail window will pop up.
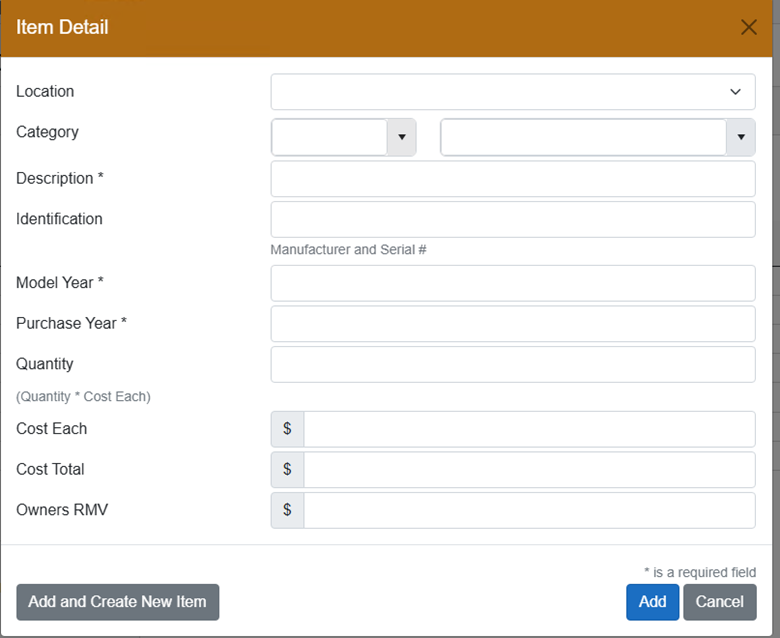
a. select the location of the asset from the drop down.
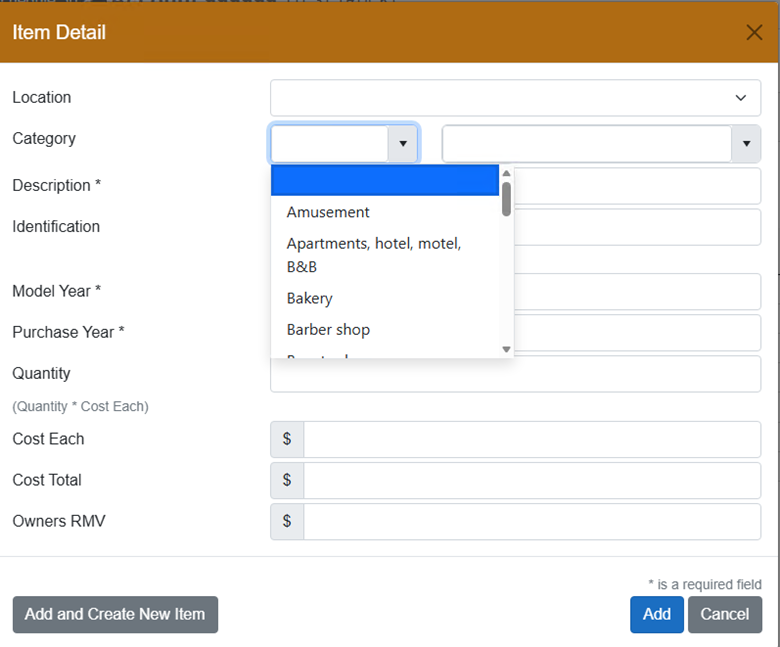
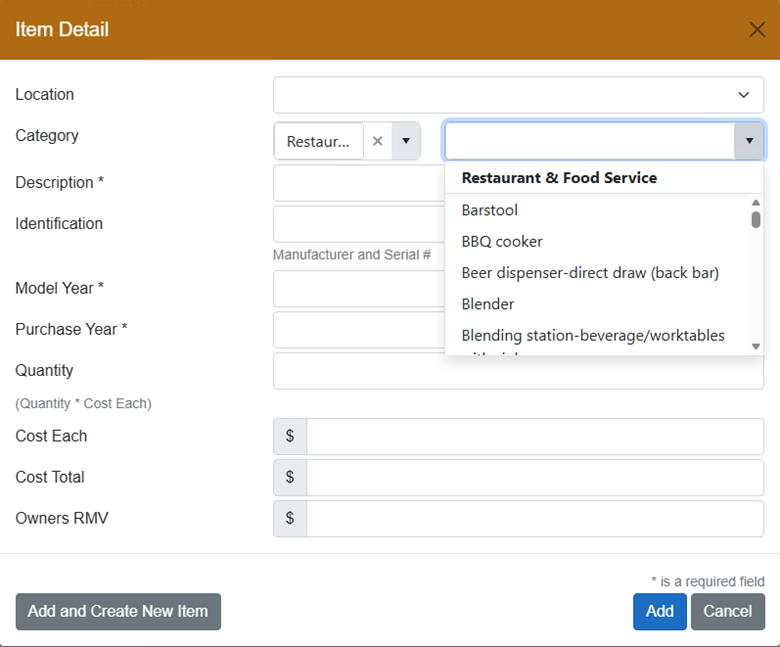
b. Select a category from the drop down: the first drop down is business type where you would find the asset, the second drop down is a list assets you would find under that business type.
c. Fill in the rest of the fields – Description, Model Year, Purchase Year, and Cost are required. If you are listing an item that is used, donated, or handmade include the Cost Price of what the item is worth.
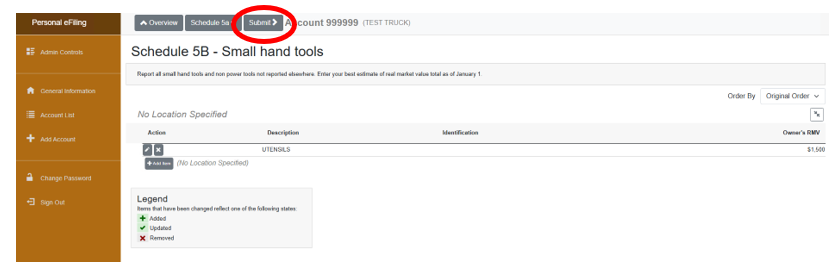
7. Schedule 5B – Small Hand Tools
You can add multiple lines to separate out small hand tools if you are entering Employees Tools, or have different categories of Small Hand tools – this is an estimate of what you had on hand January 1st at 1 a.m.

8. Submitting your Return
Once All your assets have been entered you will hit the gray submit button at the top which will take you to the taxpayer declaration page.
On the Taxpayer’s declaration page you will fill in all the boxes and click the Agreement box and submit.

Once you have submitted you will receive an email that you have submitted and your dashboard will show your account highlighted in green. You have the ability to print the asset list that you submitted.
Made an Error?
You will need to contact our office so we can open your return back up for you to make corrections. We can be reached at personal.property@bentoncountyor.gov or 541-766-6269
Contact Us
• If you have lost your authorization code or have filing questions please contact: Benton County Department of Assessment via email: personal.property@bentoncountyor.gov or telephone at 541-766-6269.